Overview of the day:
During the lecture Ted went through the rangefinder code and setup as well as reiterating the size and weight requirements for the tip the can competition. Once we got to the lab Cillian finalised our code with help from me and Adam and I soldered wires to the switch. We discussed plans for the chassis in more detail.
Lecture:
Ted first went through the requirements for compliance and the basic structure for the competition next week. He then explained to us how to use the HC-SR04 rangefinder. Although we had already mostly figured it out, it helped us further understand how it works and how to write the code for it.
These diagrams that Ted drew up were really helpful in better understanding the rangefinder:


He then wrote some example code up on the projector, although this was not needed by us as we already had our code pretty much done for the rangefinder.
Lab work:
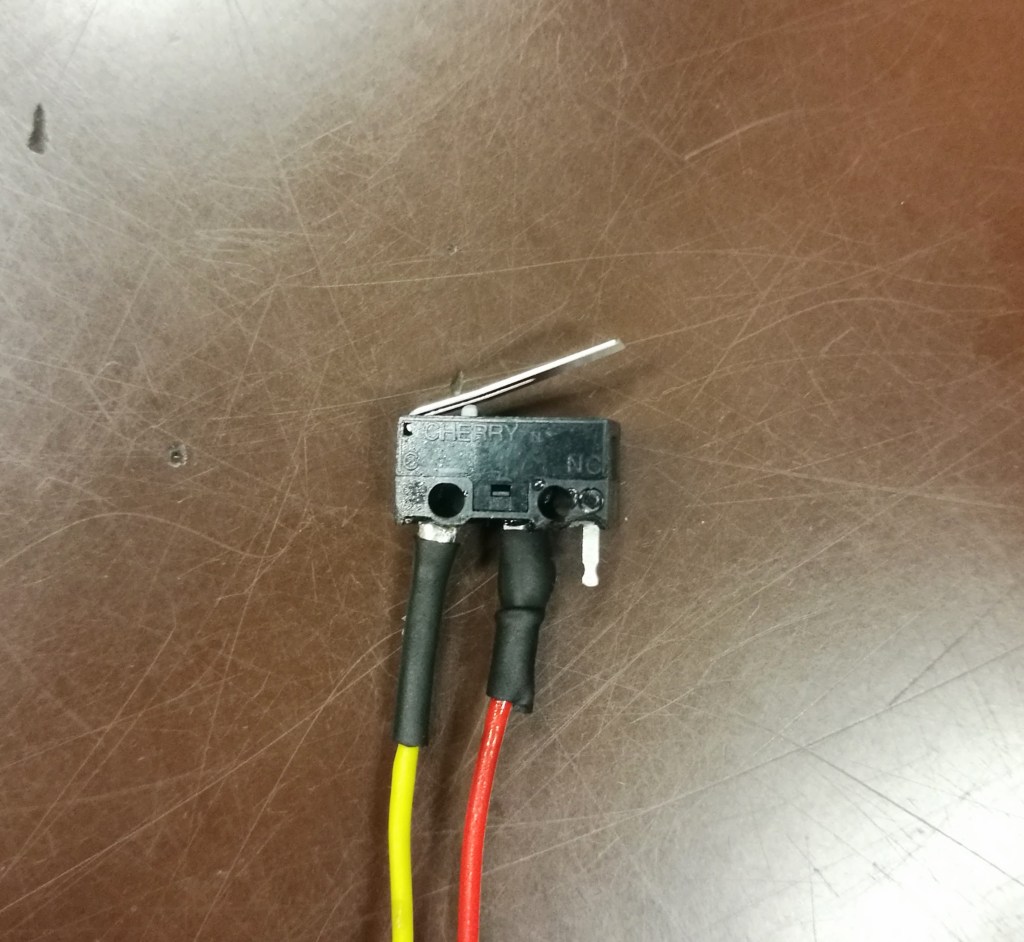
I started out in the lab by soldering wires to the momentary switch. I soldered a yellow wire to the ‘common’ pin as it would be connected to the digital output pin on the Arduino, and I soldered a red wire to the ‘normally open’ pin as that was going to 6V. I then covered the connections in heat shrink which would protect the wires from shorting out.
Then we all worked together to pretty much finalise our code for the tip the can competition next week. We ended up with this code:
// Code used for Tip the Can for RoboSumo
// Written by Cillian O'Brien
// Last Updated 26.02.2020

//////////////////////////////////////////////////////////////////////////
// [Notes for Before the Challenge]
// Adjust motor direction based on final build of chasis
// Change the distance [range] of sensor to the diameter of the arena
// Ensure to comment testing code
// Clean Up Code
//////////////////////////////////////////////////////////////////////////

  // Defining Pins rather than using ints, seems to solve a few issues that were happening
  #define button 4      // Switch button
  #define echoPin 5     // Trigger Pin for Sensor
  #define trigPin 6     // Echo Pin for Sensor

  long duration, distance;      // Defines variables for duration of pulse, and distance from object

void setup() {
  Serial.begin(9600);   // Sets baud rate for info from sensor [FOR TESTING]
  pinMode(trigPin, OUTPUT);   // Set up the trigger pin
  pinMode(echoPin, INPUT);    // Set up the echo pin

  pinMode(2, OUTPUT); // Motor 1 Forward
  pinMode(3, OUTPUT); // Motor 1 Backward
  pinMode(8, OUTPUT); // Motor 2 Forward
  pinMode(9, OUTPUT); // Motor 2 Backward

  pinMode(button, INPUT);  // Switch Voltage Check

}

void loop() {

  int push = digitalRead(button);      // Setting up var for reading when button is pushed

  digitalWrite(trigPin, LOW);
  delayMicroseconds(20);
  digitalWrite(trigPin, HIGH);  // Set trigPin high
  delayMicroseconds(20);
  digitalWrite(trigPin, LOW);   // Send pulse for 20 us


  duration = pulseIn(echoPin, HIGH);  //pulseIn detects the duration of pulses from trigger
  distance = (duration/2)*0.034;  // Time to reach object * Speed of Sound in cm/us


  Serial.print(distance);   // This is to print the distance (in cm) of the rangefinder
  Serial.println(" cm");    // is detecting [FOR TESTING]


  if (push == 1) {          // Button is Pressed [Hit the Can]

    digitalWrite(2, LOW);         // Keeps Going Forward for 1 Second
    digitalWrite(3, HIGH);
    digitalWrite(8, LOW);
    digitalWrite(9, HIGH);
    delay(1000);

    digitalWrite(2, HIGH);        // Goes Backward for 2 Seconds
    digitalWrite(3, LOW);
    digitalWrite(8, HIGH);
    digitalWrite(9, LOW);
    delay(2000);

    digitalWrite(2, LOW);         // Stops for 60 Seconds
    digitalWrite(3, LOW);
    digitalWrite(8, LOW);
    digitalWrite(9, LOW);
    delay(60000);

  }

  else {                    // Button is Not Pressed [Hasn't Hit the Can]

    if (distance < 10) {
      // Object within Range
      digitalWrite(2, LOW);      // Goes Forward [Sees Can]
      digitalWrite(3, HIGH);
      digitalWrite(8, LOW);
      digitalWrite(9, HIGH);
    }
    else {
      // Object Out of Range
      digitalWrite(2, LOW);       // Turns [Default Mode]
      digitalWrite(3, HIGH);
      digitalWrite(8, HIGH);
      digitalWrite(9, LOW);
    }
  }

  delay(50); // Delay to allow ultrasonic reflections to die out


}
The idea for our code is to have the robot spin by turning the motors in the opposite directions, until the rangefinder reads the tin within range. Once it does, the motors spin in the same direction (forwards) until the switch is pressed. Once this happens, the motors continue to spin forwards for 1 second just to make sure the tin has registered our robot hitting it. It then reverses for 2 seconds and does nothing for 60 seconds, basically it is finished its code.
What I learned:
This week I got a better understanding of how the rangefinder works, and the code that goes with it. I also believe I improved my teamwork skills as the three of us were discussing what we will do next week at the competition.
The challenges my team faced:
This week ran quite smoothly. I had some trouble with the soldering joints not bonding initially, but eventually I got them to bond well and have good electrical connections.
Our tasks for next week:
For next week we need to further the detail of what our design will be for the competition. Adam is going to cut out different sized wooden pieces to make a base for the robot. He is also going to go to various model shops to see if they have suitable wheels for the motors.
 Eric's RoboSumo blog