Overview of the day:
Week 2 started off with a lecture from Ted about getting our WordPress blog up and running, giving us the rough module schedule, explaining the tip the can competition, teaching us of the importance of colour coding and finally introduced us to laser cutting and the application Inkscape. We then moved on to lab work where my team started to work on the motors and then tried to troubleshoot why they were working only intermittently.
Lecture:
For the duration of the RoboSumo module, we will be required to post weekly on a blog our progress and what we’re learning along the way. Ted introduced us to WordPress, which I have used once before in transition year, a website for creating your own personalised websites/blogs! He showed us how to sign up and pick a blog theme, and some tips for inputting videos and code into our blog posts. We were tasked with writing our first blog post of week 1.
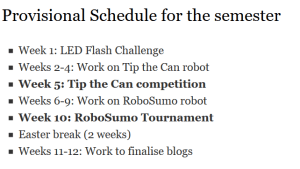
Ted then showed us the schedule for the module, which is as follows, (taken from the Robosumo Cookbook website):
Ted explained to us the tip the can competition, which is like a warm up competition in preparation for the real RoboSumo competition. The task is to have a robot that locates a stationary can, drives into it, registers it has driven into it and then reverse back a bit and stop. If this task was completed then a green light would come on on the can, and if not then a red light comes on. The basic restrictions of the robot are that it has to be a maximum of 100mm in each dimension and weigh under 500 grams. I look forward to seeing how our robot does, I believe my team are capable of getting a good time in the competition.
Ted then briefly ran through the importance of colour coding a circuit. Colour coding a circuit is essential to be able to easily see what wire goes where during troubleshooting, and is helpful to other people outside of your team who are not familiar with your circuit as they can easily identify where the wires go. Red wires are used for current flow that is always positive, black wires are used for current flow that is always negative, yellow wires are used for passing signals like between the arudino and a sensor for example and finally purple wires are used for the motors.
Ted then told us about how laser cutting our robot chassis is a viable option as you can create whatever design you want in the application Inkscape and the technical staff will cut it out of perspex. My team and I are considering going for this option, but we haven’t decided yet.
Lab Work:
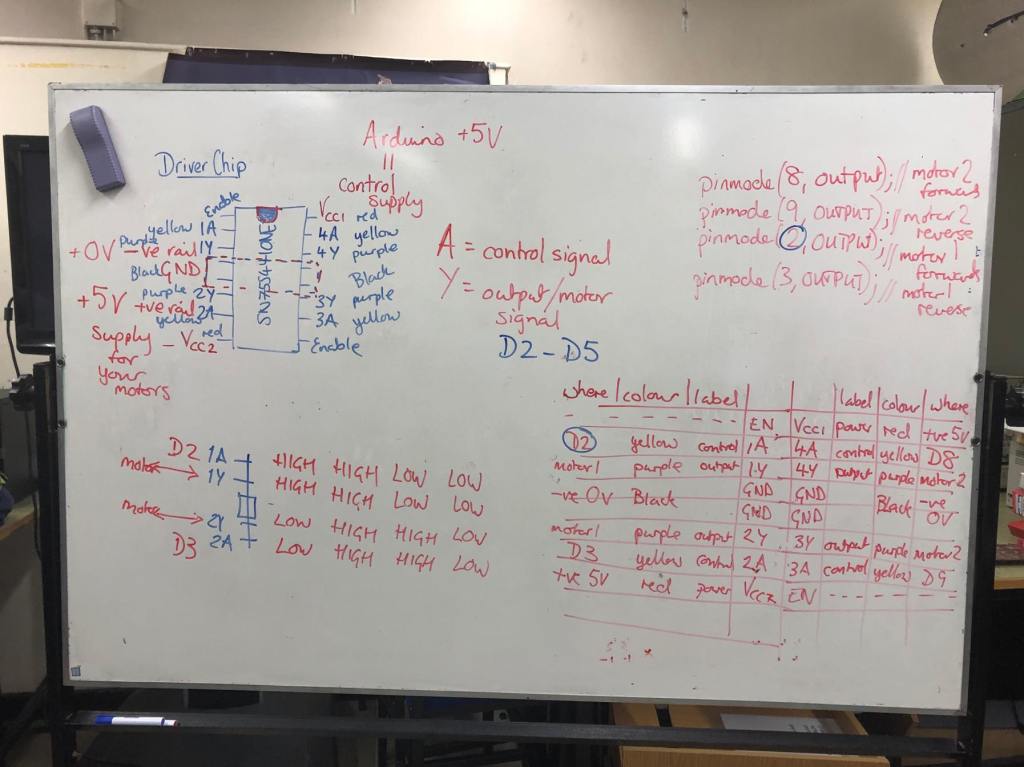
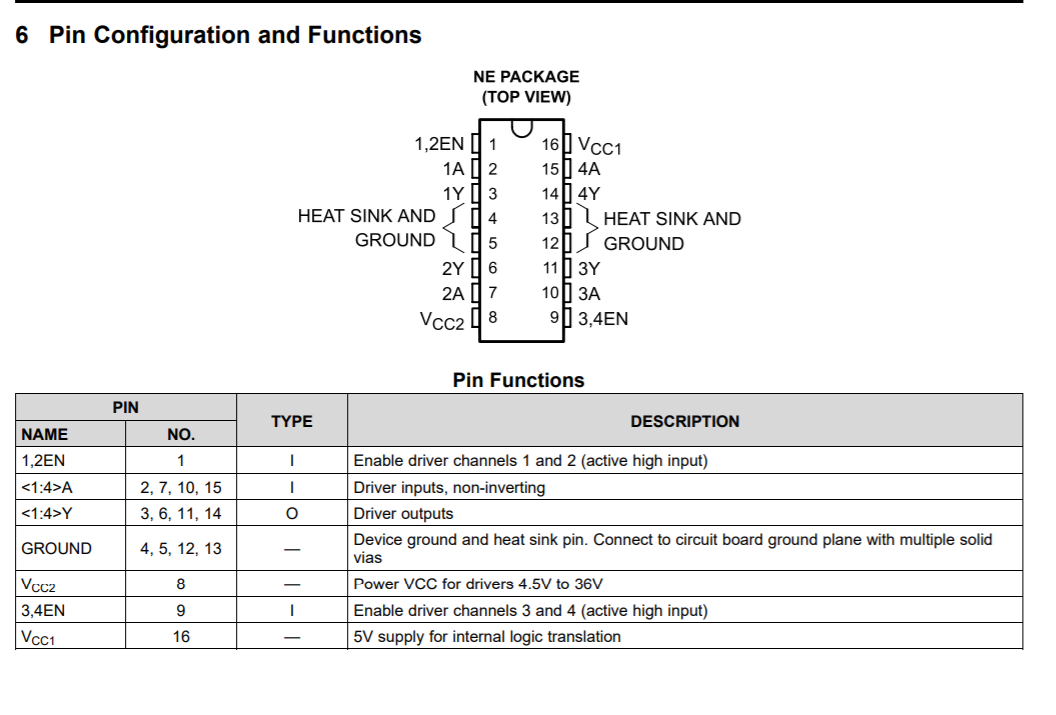
We started off lab work by trying to configure our Arduino to work with the SN754410NE driver chip. This driver chip is used to boost the power going to the motors so that they can turn faster. Without this, the motors spin incredibly slowly as the maximum output voltage of the Arduino Nano is only 5V. We used the driver chip’s data sheet to figure out how to connect the chip to the Arduino. Emma also explained to us the functions of each pin and drew a diagram of the chip, which proved very useful when hooking up the wires and motors to the breadboard and Arduino.
I had previous soldering experience as I have worked on some electrical components in the past. I built a quadcopter a few years ago for example, which required me to learn the basics of soldering. I also did some soldering in the Space Module part of the design projects module here in TUD. Therefore, I nominated myself to do the majority of the soldering work for this project. My first task was soldering wires to the motors. I made sure to pre-tin the stripped sections of each wire as well as pre-tin the copper connections on the motors. This meant that when I brought the wire and motor together and heated it with the iron, they would join together nicely without having to add too much solder as they already had solder on them. The solder joints seemed to be good and I was happy with them, although I believe I heated one for too long as part of the plastic on the motor melted somewhat. In the future I’ll know to be careful as to not overheat the delicate thin metal connectors on the motors. Adam helped me with the soldering by holding the wires in place, as otherwise it can be difficult to keep everything still, which is necessary as to not end up with a cold solder joint.
Once I had soldered the wires to the motors and wrapped electrical tape around them to give some mechanical strength, we tested the motors out with the code that Cillian was working on, with input from me and Adam.
Unfortunately we were running into issues with how the code was running. The motors weren’t spinning in the way that they should have. They were intermittently starting and stopping in an unpredictable way. At first I thought that it was maybe a bad solder joint, but we tested different motors and they seemed to be doing the same thing too. Emma suggested that we replace the motors and some of the wire paths with LEDs so we could better troubleshoot the problem. It showed that the problem wasn’t with the motors as it persisted.
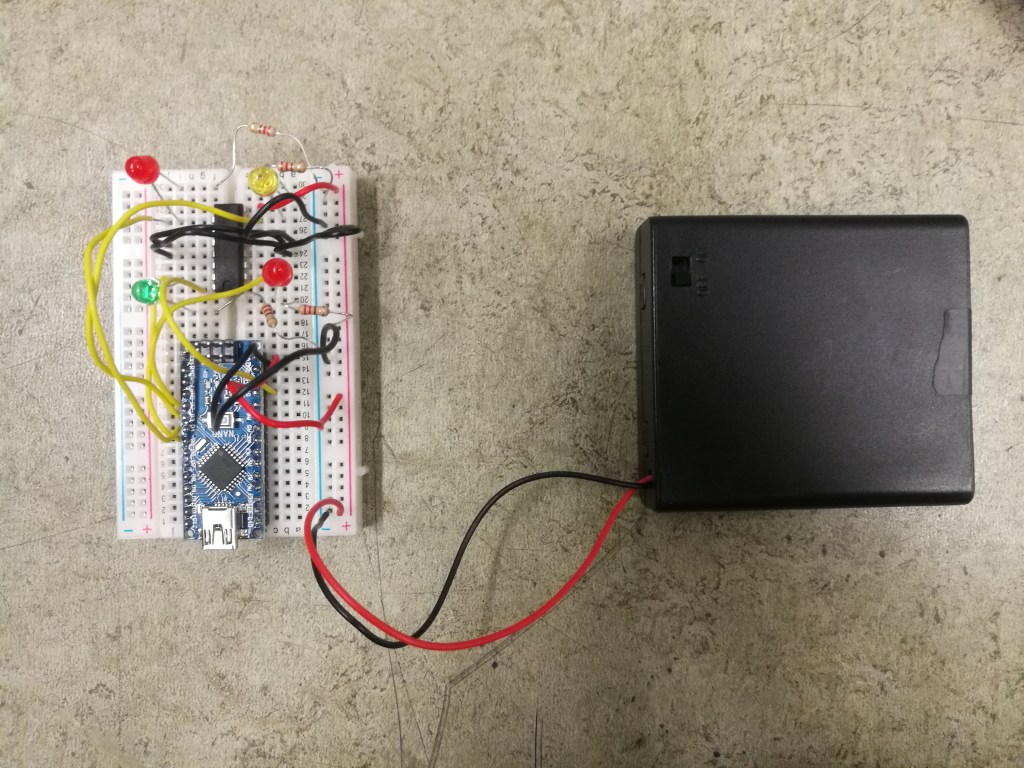
With Emma and Cillian scrutinizing the code they were sure that nothing was wrong there, so we double checked all of our wiring and swapped out the driver chip to see if that was the issue. The problem didn’t go away, so eventually we swapped out the Arduino itself, loaded the code onto the new board and hooked everything back up.
Thankfully the motors now spun as per the code. We were glad that everything was in working order and were finished with the Arduino for the day. Next, we signed up to WordPress and started on our first blog post.
What I learned:
This week I learned mainly about the steps involved in troubleshooting, trying to go thorough it methodically and logically, isolating one part each time and eventually figuring out what part is broken. I also brushed up on my soldering skills, as I feel like each solder joint I did improved on the last. I had also never soldered components that delicate and so learned how important being careful with the heat time is.
The challenges my team faced:
This week we of course were challenged when trying to fix the intermittent issues with the motors spinning strangely, but eventually overcame this and isolated the broken Arduino board and replaced it.
Our tasks for next week:
For next week we need to start thinking about ideas for our robot chassis for tip the can, and start researching any parts we might need to purchase.
 Eric's RoboSumo blog